
Inventor
Inventor is a Computer Aided Design program that allows the user to create 3D objects. In class we learned how to create small 3D widgets using additive and subtractive processes.
STEP 1: Create a new file in Autodesk Inventor, make sure to create a "Standart.ipt" file
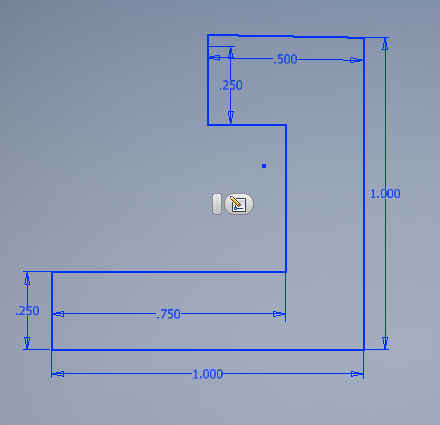
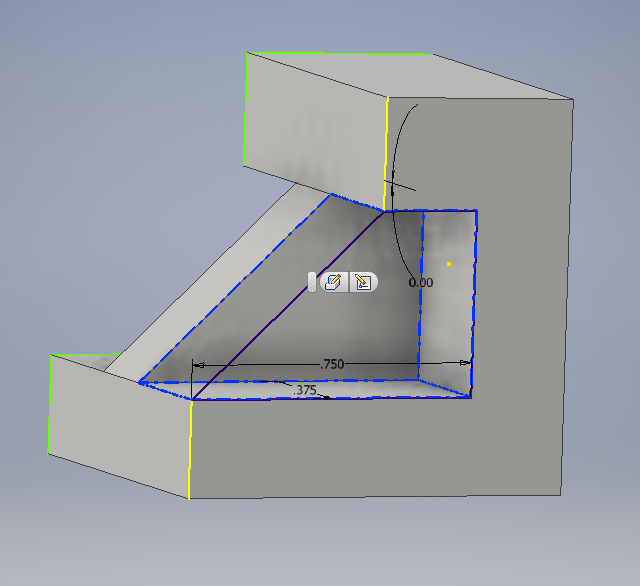
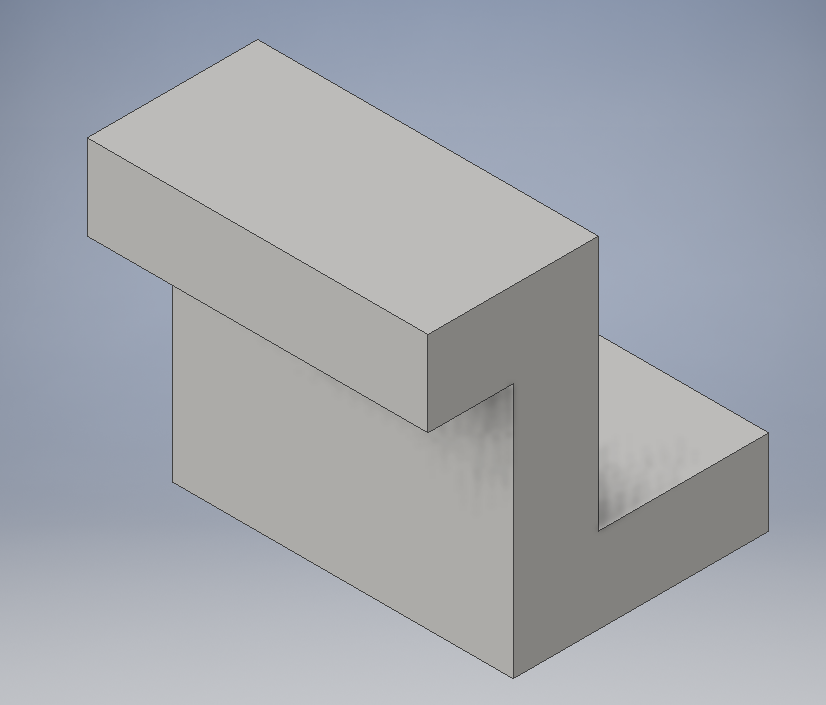
STEP 2: Create a 2D sketch of the object, be sure to include exact dimensions
STEP 3: Move the sketch to the 3D version, and extrude the sketch 1 inch outwards
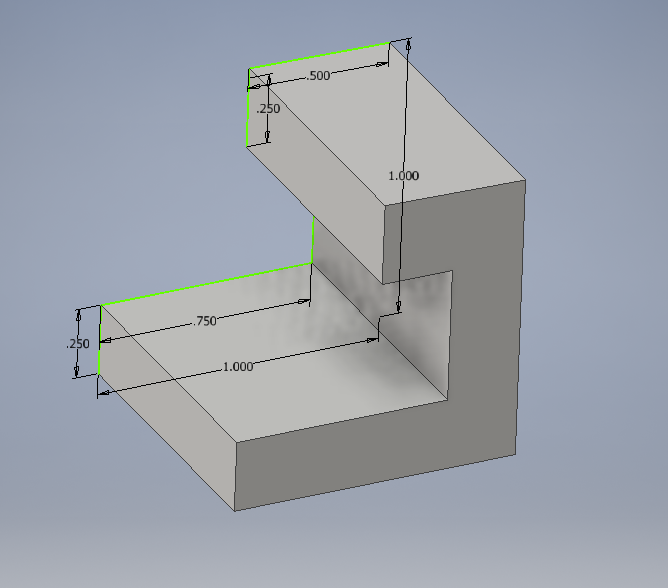
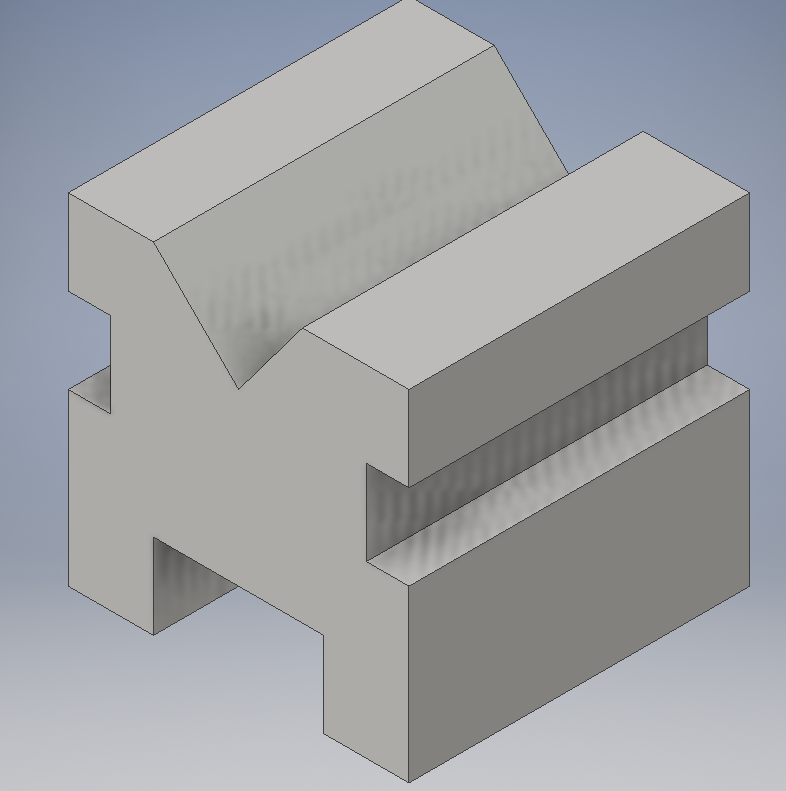
STEP 4: Move back to 2D sketch, and sketch the shape of the ridge that runs along the middle of the widget. Extrude that sketch along the entire length of the widget
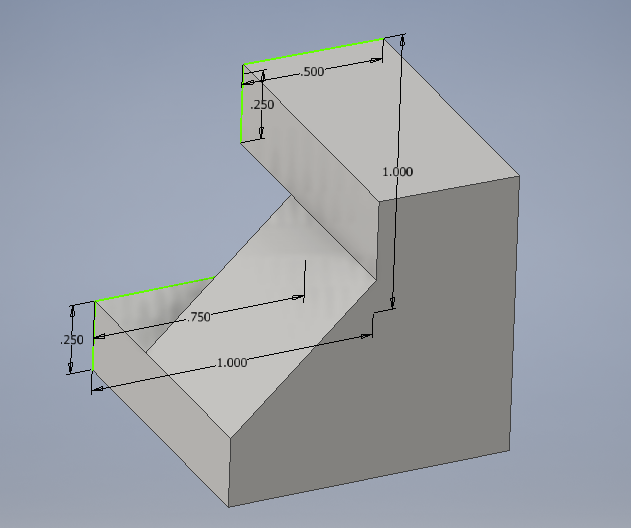
STEP 5: Sketch the shape of that same ridge, and extrude the sketch so the sketch will cut to the correct dimensions
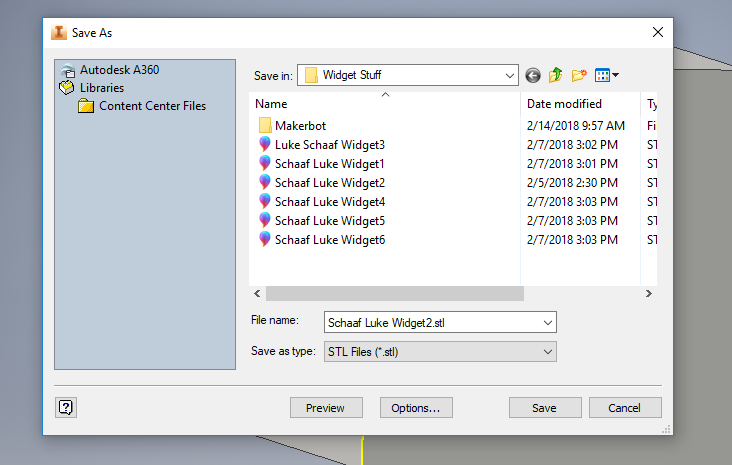
STEP 6: When you're ready to print, export your autodesk file in CAD format and save it as an STL file
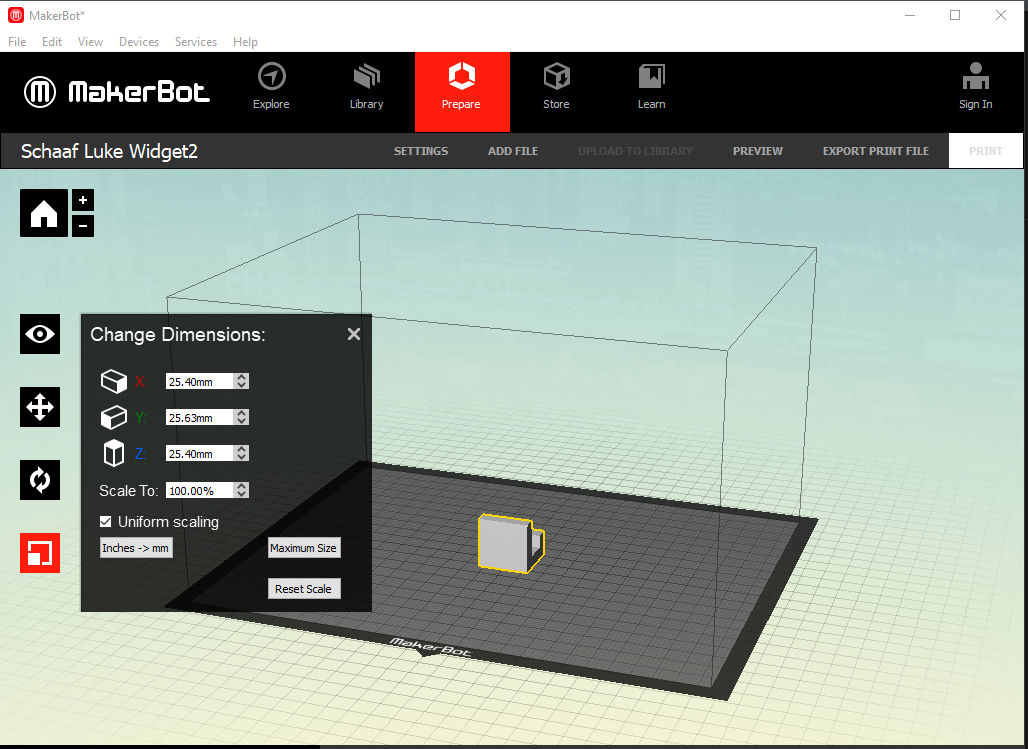
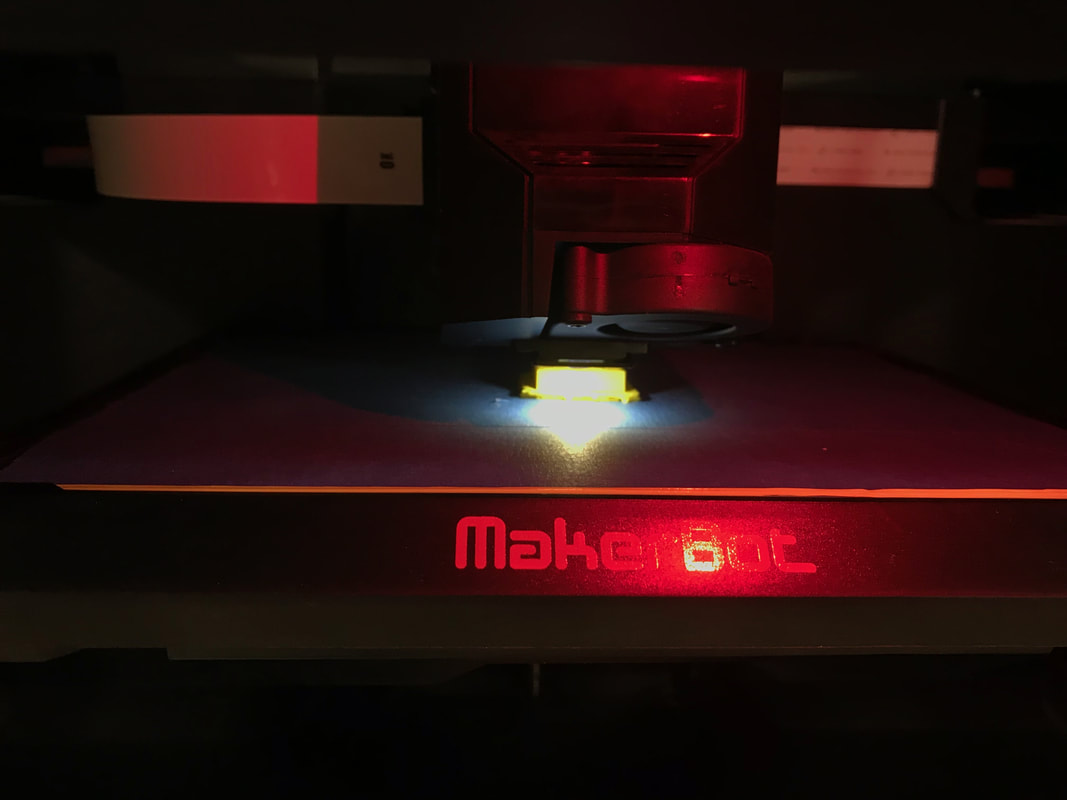
STEP 7: Open the STL file in MakerBot* and rescale the object to 1000%
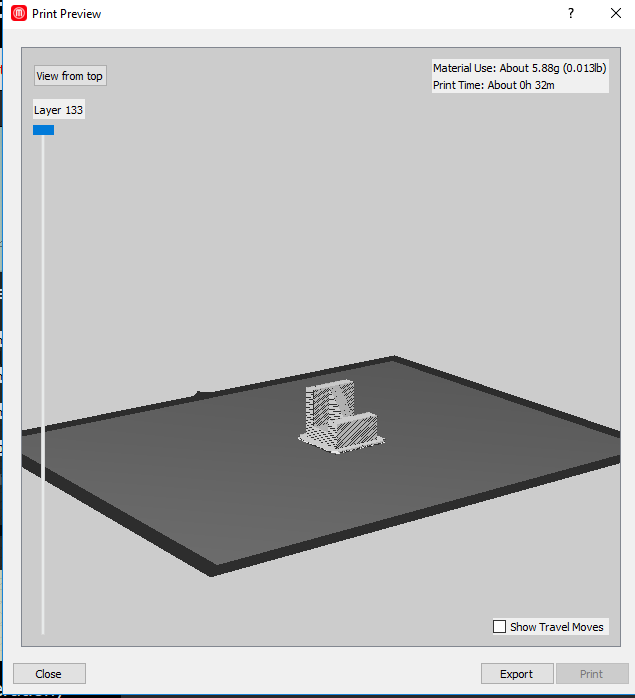
STEP 8: Export the makerbot file to a flashdrive, insert the flashdrive into the 3D printer, and start printing!
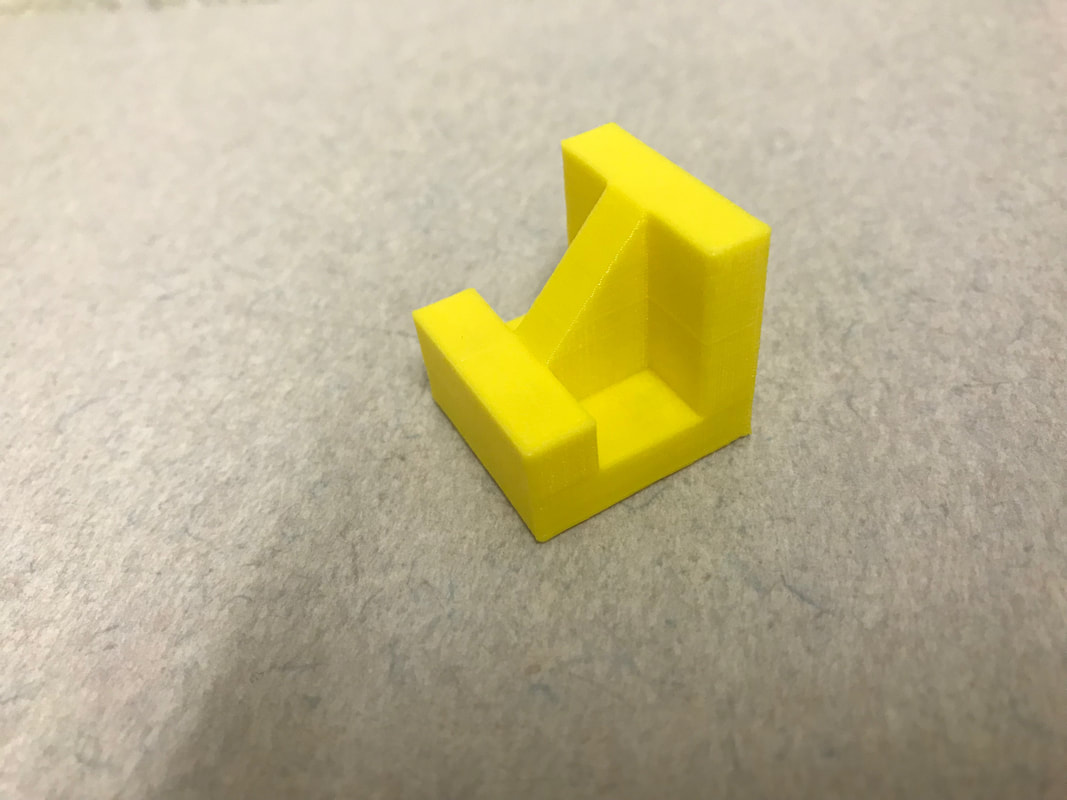
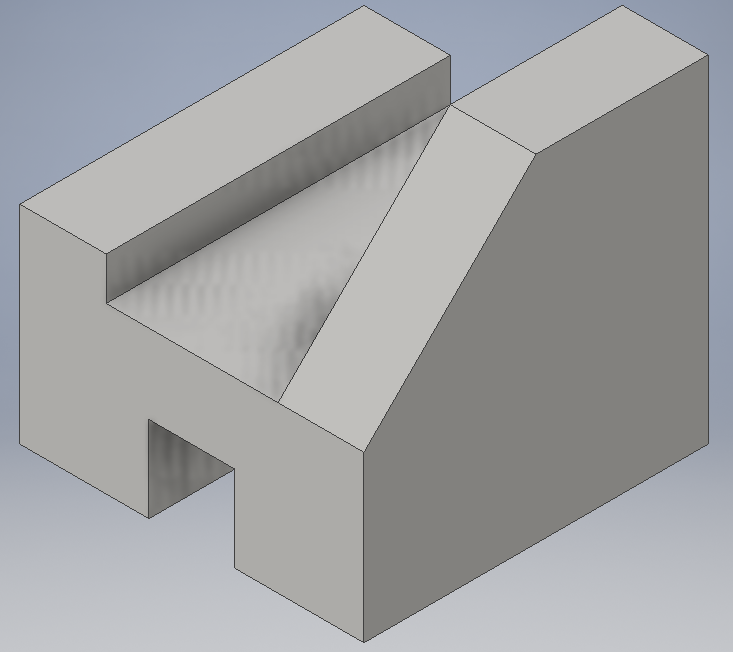
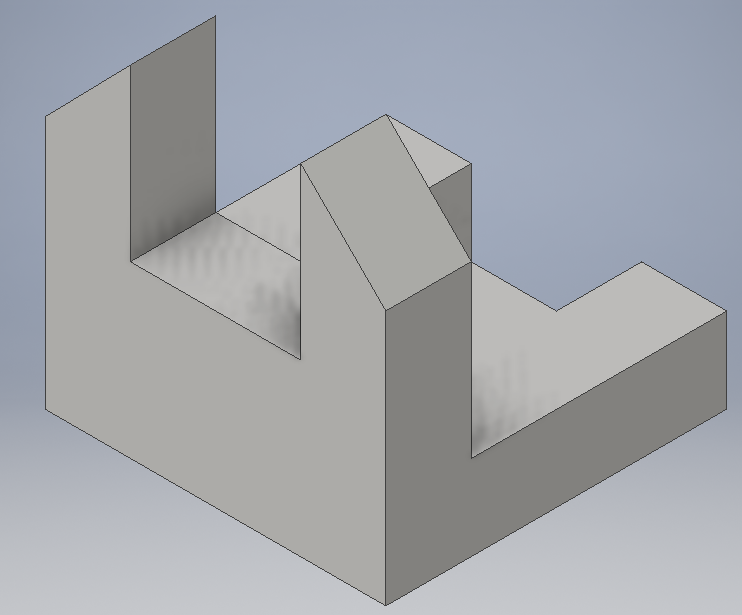
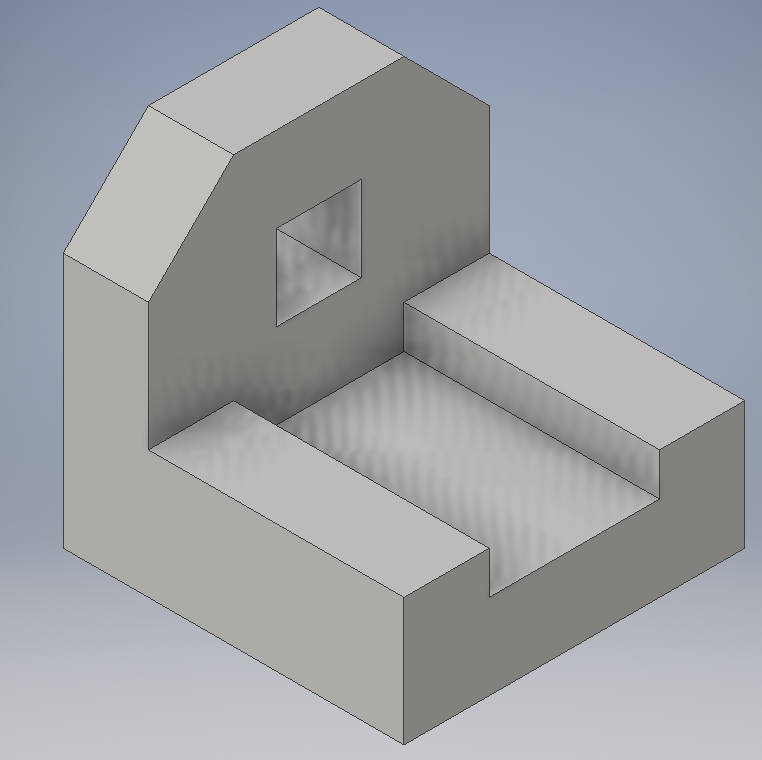
Final Product:

Overall, Inventor is an extremely powerful software used to design 3 dimensional objects. The program is extremely intuitive and easy to use. At first I had trouble figuring out the software, but I eventually got the hang of it and now it comes naturally for me to use. I learned how amazing Computer Aided Design programs are and how helpful their uses will be in creating new technology and making ideas into a real thing.
